Ever thought about making pineapple lumps at home? This recipe uses just a few ingredients to bring a taste of summer into your kitchen. The Regina Confectionery Company first made them in the 1950s. Now, they’re a favorite treat for many.
We’ll look at the key ingredients you need to make these candies. You’ll need fresh pineapple, vegan butter, and more. It’s surprisingly easy to make these treats that will make your taste buds happy. So, let’s start making these sweet goodies!
Key Takeaways
- This candy requires only 5 main ingredients plus an optional pinch of salt.
- Fresh pineapple chunks are a must for that authentic taste.
- Preparation time is just 20 minutes, with a cooking time of about 1 hour and 20 minutes.
- The recipe yields approximately 550 g of pineapple curd, perfect for sharing.
- Enjoy each serving guilt-free, with only 63 calories!
Introduction to Pineapple Lumps
Pineapple lumps are a special treat from New Zealand. They have a chewy marshmallow center with pineapple flavor. This is covered in chocolate, making them a tasty delight.
This tropical treat brings back happy memories for many. It reminds them of fun times, celebrations, and simple joys.
Charles Diver at Regina Confection invented them in the early 1950s. They quickly became a favorite sweet snack in New Zealand. The name change from chunks to lumps made them even more popular.
Now, after changes in ownership, pineapple lumps still delight candy fans. They can be made at home, adding to the joy. This way, you can create new memories while enjoying a delicious tropical treat.
What Are Pineapple Lumps?
Pineapple lumps are a special kind of pineapple confectionery. They have a soft marshmallow center with pineapple flavor. They are then covered in chocolate. This treat was first made in New Zealand in the early 1950s by Charles Diver at Regina Confection company.
They were originally called pineapple chunks. But in the 1960s, they became known as pineapple lumps. Now, they are a beloved snack in New Zealand, bringing back memories for many.
Even though they have changed hands over the years, their taste remains the same. They mix the sweetness of pineapple with the richness of chocolate. This makes them a favorite treat around the world.
| Feature | Details |
|---|---|
| Invention Year | Early 1950s |
| Original Name | Pineapple Chunks |
| Flavor Profile | Pineapple with Chocolate Coating |
| Texture | Soft to Chewy |
| Calories Per Serving | 169 |
| Recipe Yield | Approximately 20 pieces |
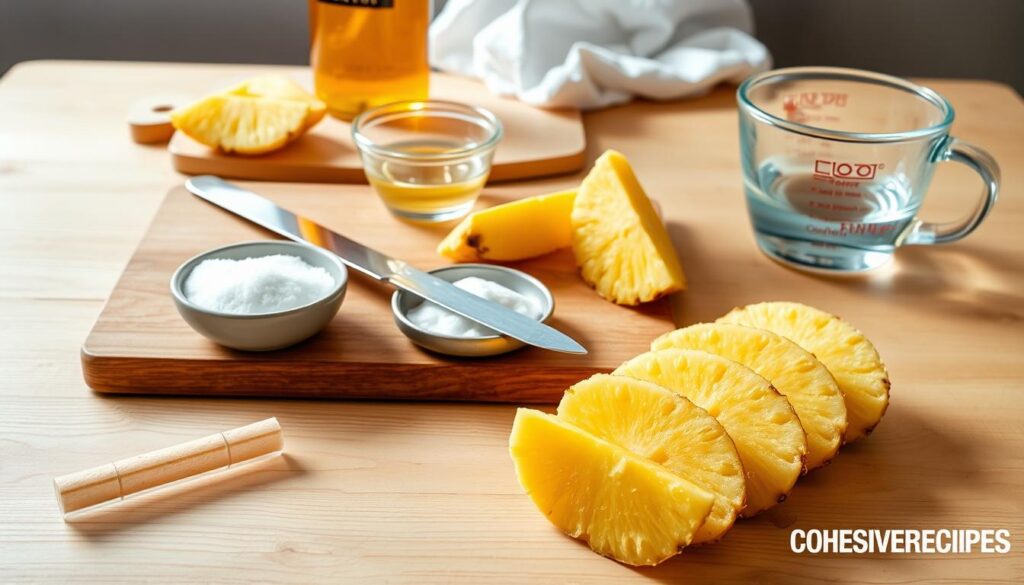
Homemade Pineapple Lumps Recipe Ingredients
Making homemade pineapple lumps is all about picking the right ingredients. Knowing what you need can make the process more fun. Here, we’ll cover the key ingredients and some extra flavors to make your treats special.
Essential Ingredients List
The list for homemade pineapple lumps includes :
| Ingredient | Amount | Role |
|---|---|---|
| Marshmallows | 200g | Provides a soft, chewy base. |
| Water | 1 tablespoon | Helps to melt marshmallows smoothly. |
| Icing Sugar | 400g | Sweetens and thickens the mixture. |
| Yellow Food Dye | As needed | Adds vibrant color. |
| Dried Pineapple or Pineapple Flavoring | To taste | Infuses flavor into the lumps. |
| Cooking Chocolate | For coating | Creates a sweet outer layer. |
Optional Flavor Enhancements
Want to make your pineapple lumps even better? Try adding desiccated coconut for a fun texture and tropical taste. You can also mix in other fruit flavors to create new versions of this favorite candy. Playing with these ingredients can help you make unique homemade pineapple lumps.
Supplies Needed for Homemade Pineapple Lumps
Making homemade pineapple lumps is fun with the right tools. You need the best kitchen utensils to get great results. Knowing what tools and ingredients to use makes cooking with pineapple easy and fun.
Key Kitchen Utensils
- Pot: Ideal for melting marshmallows and chocolate effectively.
- Mixing Bowl: A must-have for combining your pineapple and marshmallow mixture.
- Rolling Pin: Useful for rolling out the dough to the perfect thickness, between ¼ inch and ½ inch.
- Cookie Cutters: Necessary for shaping your pineapple lumps into the desired rectangle sizes of approximately 1 x 2 inches.
Recommended Supplies for Best Results
Using the right supplies can make your homemade pineapple lumps sweeter and better textured. Here are some top picks:
| Supply | Purpose |
|---|---|
| Double Boiler | Creates a gentle heat for melting chocolate without burning. |
| Food-Grade Baking Paper | Prevents sticking and allows for easy cooling. |
| Dried Pineapple Slices | Provide flavor and texture to the pineapple lumps. |
| Dark or Milk Chocolate (8 oz) | Coating for the pineapple lumps. |
Step-by-Step Instructions to Make Pineapple Lumps
Making pineapple lumps is a fun process. Follow these steps to create a tasty treat at home. This guide will help you from the beginning to the end.
- First, get your ingredients ready: 275 g of pineapple, 100 g of brown sugar, 60 ml of water or pineapple syrup, 2 teaspoons of lemon juice, and ½ tablespoon of cornstarch mixed with 1 tablespoon of water.
- Next, chop the pineapple into small pieces. This helps it cook evenly. If using canned pineapple, make sure to drain it first.
- Then, mix the chopped pineapple, brown sugar, water, and lemon juice in a saucepan. Heat it over medium until it boils.
- While the mixture boils, mix the cornstarch solution. Add it to the boiling mix and stir constantly. It will thicken in 5 to 7 minutes. You can adjust the thickness by changing the cooking time.
- After it thickens, take it off the heat and let it cool. You can store it in the fridge for 4 to 5 days or freeze it for 2 months.
- For the final step, spread the cooled filling on parchment paper. Cut it into the shapes you like once it’s completely cool.
This guide will help you make delicious pineapple lumps. You can enjoy them as candies or use the filling in other desserts!
Melting Marshmallows: The Key to Texture
Getting the right texture for pineapple lumps depends a lot on melting marshmallows well. It’s important to pick marshmallows that are just right in moisture and softness. This part will help you choose the best marshmallows and show you how to melt them right.
Choosing the Right Marshmallows
Choose marshmallows that are fresh and soft. Different brands can melt differently, affecting your pineapple lumps’ texture. Go for baking or gourmet marshmallows. They melt better and mix well with your recipe.
Techniques for Melting Marshmallows
It’s key to melt marshmallows safely to avoid burning or clumps. Here are some good ways to do it:
- Double Boiler Method: This method uses indirect heat to gently melt the marshmallows. Place a heatproof bowl over a pot of simmering water, allowing the steam to do the work.
- Microwave Method: Use short bursts of heat, typically 30 seconds at a time. Stir between each interval to ensure even melting and to check for any potential burning.
- Stovetop Method: If using a direct heat source, set the burner to low and continuously stir the marshmallows to maintain a smooth consistency. This method requires attentive monitoring to avoid burning.
Using these methods will help you melt marshmallows better. This will make your pineapple lumps soft and chewy. The goal is to get a mix that’s rich and holds its shape well.
Pineapple Flavoring: Fresh vs. Dried
Pineapple flavor adds a vibrant, tropical taste to many dishes. Knowing the difference between fresh and dried pineapple can improve your cooking. Dried pineapple has stronger flavors, perfect for richer pineapple lumps.
Using dried pineapple versus fresh involves different preparation steps. These steps can change how your dish turns out.
Using Dried Pineapple
To use dried pineapple, you need to rehydrate it. Soak it in boiling water for 10-15 minutes. Or, use cold liquids for 30-45 minutes for different tastes.
This method helps dried pineapple regain some of its moisture. It becomes more enjoyable in baked goods like pineapple lumps. Dried pineapple is also great in trail mixes, salads, and savory dishes.
Why Choose Pineapple Flavoring?
Pineapple flavoring greatly enhances pineapple taste. It offers a consistent, strong pineapple flavor that’s hard to get with fresh fruit alone. This flavoring can make your dishes taste like traditional pineapple lumps without too much sugar.
Many bakers and chefs choose pineapple flavoring. It’s easier to add to recipes, ensuring every bite is full of pineapple flavor.
Shaping Your Pineapple Lumps
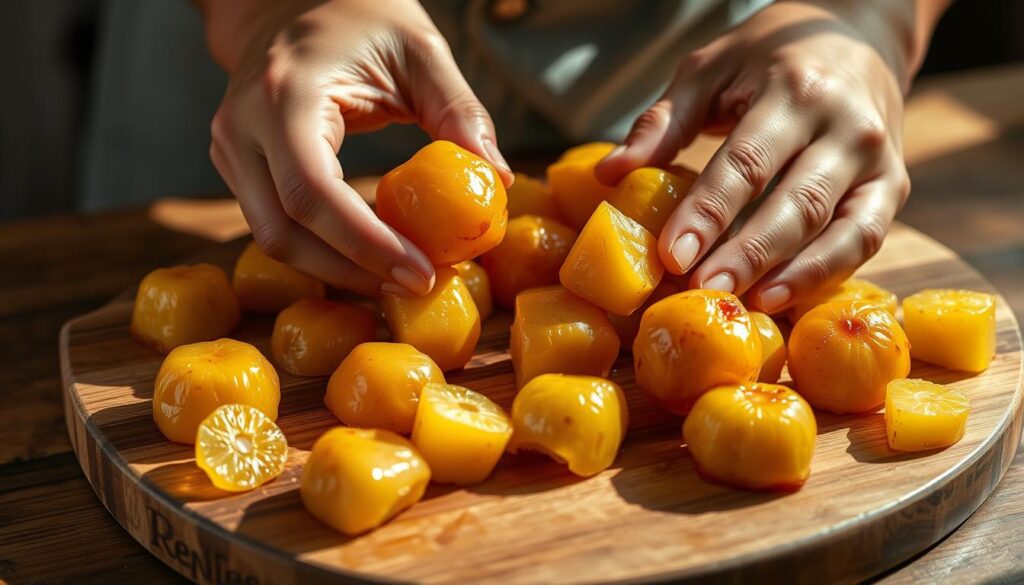
Shaping pineapple lumps is key to a perfect finish. The right thickness is crucial for a great taste. It balances the tart filling with the sweet outer layer.
Knowing how thick to make each piece is important. Aim for about one centimeter. This ensures flavors are evenly spread.
Finding the Perfect Thickness
To get the right thickness, use a rolling pin. Flatten the dough to the desired height. This makes the lumps bake evenly.
Each piece should be about 1 cm thick. This keeps the filling inside without making it too dense. A consistent thickness looks good and tastes better.
Creative Shaping Techniques
Try different ways to shape your pineapple lumps. Use cookie cutters for fun shapes. Kids love helping with this.
Rolling the dough into balls is another fun option. You can also use molds for various sizes and shapes. These techniques make your lumps look great and add fun to your recipe.
Chocolate Coating Techniques
Coating your homemade pineapple lumps in chocolate can make them taste and feel better. Knowing how to melt chocolate and apply the coat is key. Here are some top techniques to get your pineapple lumps looking great.
Melting Chocolate Safely
There are two main ways to melt chocolate safely: the double boiler and the microwave. For the double boiler, boil water in a pot and simmer it. Then, put a heatproof bowl over it with your chocolate inside. This method melts the chocolate slowly, preventing burns.
If you’re using a microwave, put the chocolate in a safe bowl. Melt it in 30-second bursts, stirring after each interval. This should take about 2 minutes to get smooth chocolate. Both methods are good for melting chocolate safely, giving your coating a shiny look.
Applying the Chocolate Coat
Coating your pineapple lumps with chocolate needs some care. First, let the chocolate cool a bit. This stops the marshmallow center from melting. Use a fork or dipping tool to coat each lump, letting excess chocolate drip off.
For extra flavor, try adding sea salt or chopped nuts to the chocolate. Chill your pineapple lumps before dipping for easier handling. Then, flash freeze them for 15 minutes for the best coating. This keeps the pineapple crunchy and delicious once set.
Storing and Enjoying Your Pineapple Lumps
Storing pineapple lumps right keeps their taste and texture perfect. The right storage methods are key to keeping homemade candy fresh. This way, you can enjoy these treats for a longer time. Here are some top tips for storing them to keep their special flavor.
Best Storage Practices
Use airtight containers to keep pineapple lumps fresh. Store them in the fridge to stop spoilage and keep their texture. Homemade candy can last up to five days when stored right, keeping its quality and taste.
To enjoy them longer, freeze the lumps. Make sure they’re wrapped well or in a freezer-safe container to avoid freezer burn. Let them thaw in the fridge overnight before you enjoy them.
Suggested Pairings and Serving Ideas
Pairing pineapple lumps with drinks can make the taste even better. Try them with chilled sparkling water or a tropical fruit smoothie for a refreshing mix. You can also add them to dessert platters with chocolate-covered fruits or serve with creamy ice cream for extra richness.
Get creative with how you serve pineapple lumps. Place them on a fancy platter or use them as a fun topping for cakes and cupcakes. These ideas make enjoying pineapple lumps even more special, creating great memories with loved ones.
Conclusion
Making your own pineapple lumps is more than just cooking. It’s a chance to enjoy tasty homemade treats that everyone will love. With just four simple ingredients, you can create a sweet mix of flavors and textures for your desserts.
When you start this tropical dessert recipe, remember to have fun. Try different flavors like mango or berries to make it your own. Making these lumps is quick, taking only five minutes, and you can freeze them for later.
You can also make these lumps your own by changing the flavors. Keep them in the freezer for up to two weeks. This way, you can serve a special treat that you made yourself. So, why not try this recipe and enjoy the tropical taste of homemade pineapple lumps today?
FAQ
What are the essential ingredients for homemade pineapple lumps?
To make homemade pineapple lumps, you’ll need 200g marshmallows, 1 tablespoon of water, and 400g icing sugar. You’ll also need yellow food dye, dried pineapple or pineapple flavoring, and cooking chocolate.
Can I use fresh pineapple instead of dried pineapple in the recipe?
Fresh pineapple can add flavor, but dried pineapple is better. It gives a stronger taste and better texture to your pineapple lumps.
How should I properly melt the marshmallows?
To melt marshmallows right, use low heat and stir constantly. This prevents burning. A pot or double boiler works best.
What supplies do I need for making pineapple lumps?
You’ll need a pot for melting marshmallows, a mixing bowl, and a rolling pin. Cookie cutters and food-grade baking paper are also necessary for cooling.
How can I enhance the flavor of my pineapple lumps?
To boost flavor, add desiccated coconut or other fruit flavors. This lets you customize your pineapple lumps.
What is the best way to store homemade pineapple lumps?
Keep your pineapple lumps fresh by storing them in an airtight container in the fridge.
What techniques can I use for shaping my pineapple lumps?
Use cookie cutters or roll the dough by hand. This creates fun shapes for your treats.
How should I apply the chocolate coating?
Let the chocolate cool a bit before dipping. This keeps the marshmallow center intact and gives a smooth coat.
What drinks or desserts pair well with pineapple lumps?
Enjoy pineapple lumps with tropical drinks like piña coladas. They also pair well with fruit salad for a sweet contrast.
How long does it take to make pineapple lumps from start to finish?
Making pineapple lumps takes about 1-2 hours. This includes prep, melting, shaping, and cooling.
Source Links
- Easy Pineapple Curd (eggless + dairy-free)
- Crushed Pineapple Muffins!
- Pineapple Lump Slice
- Pineapple Lumps
- Pineapple Lumps – The Sweet Taste of New Zealand – Snack History
- Pineapple Lumps
- Pineapple lumps
- Pineapple Lumps
- Pineapple Lump Lollie Cake
- Pineapple Lumps
- Pineapple Filling (How to Make From Scratch)
- Homemade Pineapple Juice
- Pineapple Lumps
- Pineapple Fluff: A Delicious and Easy Hawaiian Inspired Recipe
- springy, fluffy marshmallows
- How to Dehydrate Pineapple – Fresh, Frozen or Canned
- The Best Pineapple Cake
- Fresh Pineapple Salsa
- Pineapple Filled Cookies Recipe – Truffle Nation
- How to Make Pineapple Vinegar from Pineapple Scraps
- Far From Home Pineapple Lumps
- Chocolate Covered Pineapple: How to Make
- Homemade Pineapple Preserves (no canning required)
- Homemade Pineapple Soft Serve Ice Cream
- Pineapple Paste / Pineapple Jam for Pineapple Tarts
Your blog stands out in a sea of generic and formulaic content Your unique voice and perspective are what keep me coming back for more
Awesome! Its genuinely remarkable post, I have got much clear idea regarding from this post